Spaces
Workspaces are subdivided into spaces. Spaces are a way to
organize your tasks by teams, projects, or types of work in one
place.
E.g.: Corporate Headquarters, California Division, Research
& Development, Marketing Department, Remote Workers HQ,
Startup Accelerator, etc.
Creating a new space
Who can create a new Space
Only the Admin and an account with the Manager privileges are
allowed to perform this operation by default.
How to create a new Space?
You can directly create a space using the “sidebar menu”.
-
Click on the Vertical ellipsis on the right
side of the workspace name in the sidebar menu.
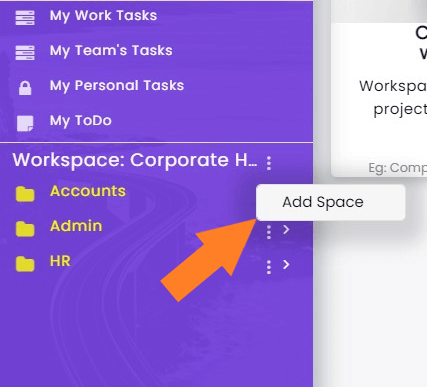
- Select 'Add space option.'.
- In the new pop-up window write the name of the space.
- Click create.
Alternatively, you can also use the following method
-
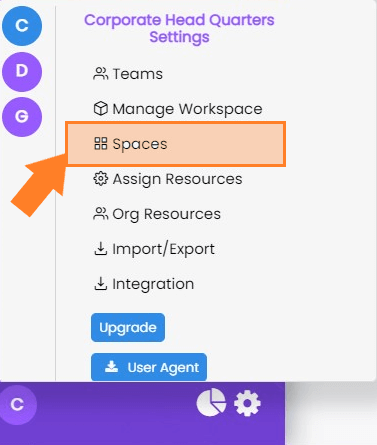
Go to the Workspace setting icon at the
bottom right corner of the window.
-
Select the workspace icon in which you want to create
spaces.
-
Click on Space icon in this menu which will open all the
spaces in the workspace.
-
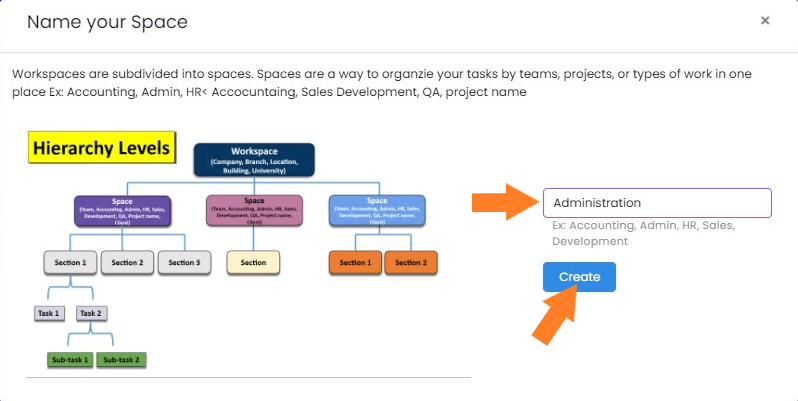
Click on 'Create a new Space'.

-
A new pop-up window will open in which you should enter the
name of your Space and Press enter or click
create button.
Assigning resources to spacese
Who can add a resource?
Only the admin is allowed to add resources.
Accounts with Guest, Client, and Members privileges cannot add
them.
Managers can utilize the resource but not add it.
How to add resources?
You should follow the given steps to add resources in spaces.
-
Navigate to a particular workspace in which you want to add
a resources.
-
Go to Workspace settings by clicking on the
workspace icon.
- Select the Spaces option.
-
A new window containing the names of all the spaces in the
given Workspace will open. Search for the required space.
-
Select Assign team/Resource .
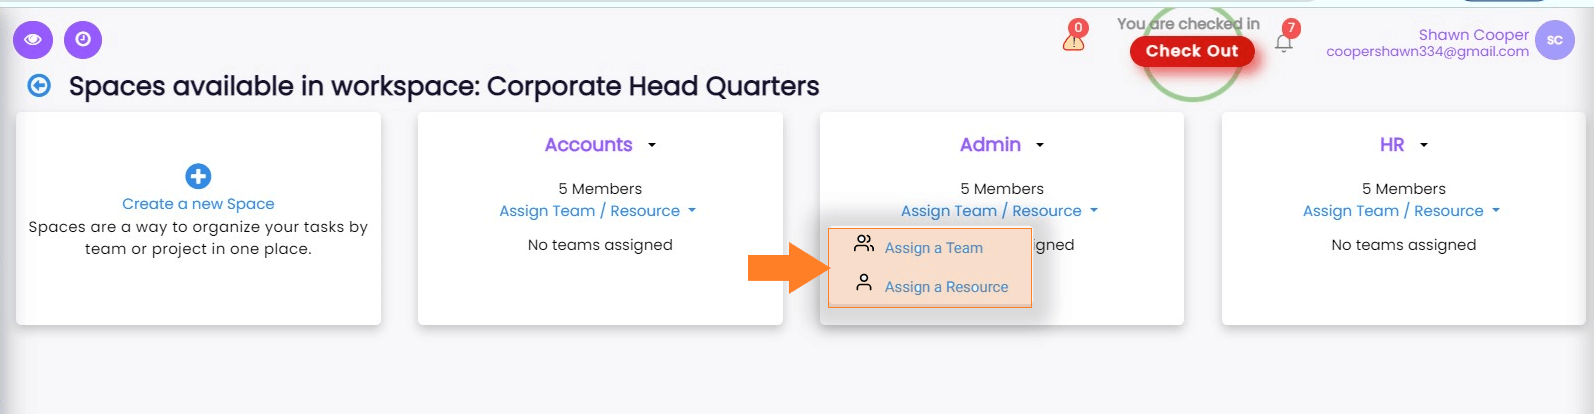
-
Assigning a team -
-
Click on Assign a team.
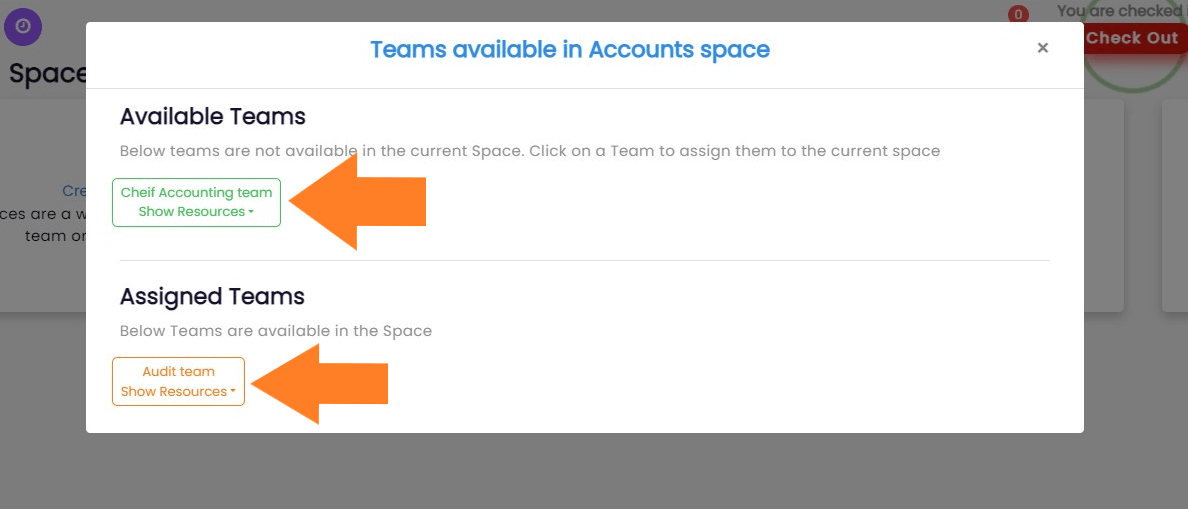
-
Now you can assign or remove teams from the given
options in the new pop-up opened. Click on the team name
in the 'Available Teams' it will be
assigned to that space for use.
-
Alternatively, clicking on the team name in
Assigned Teams would remove them from
the given Space
-
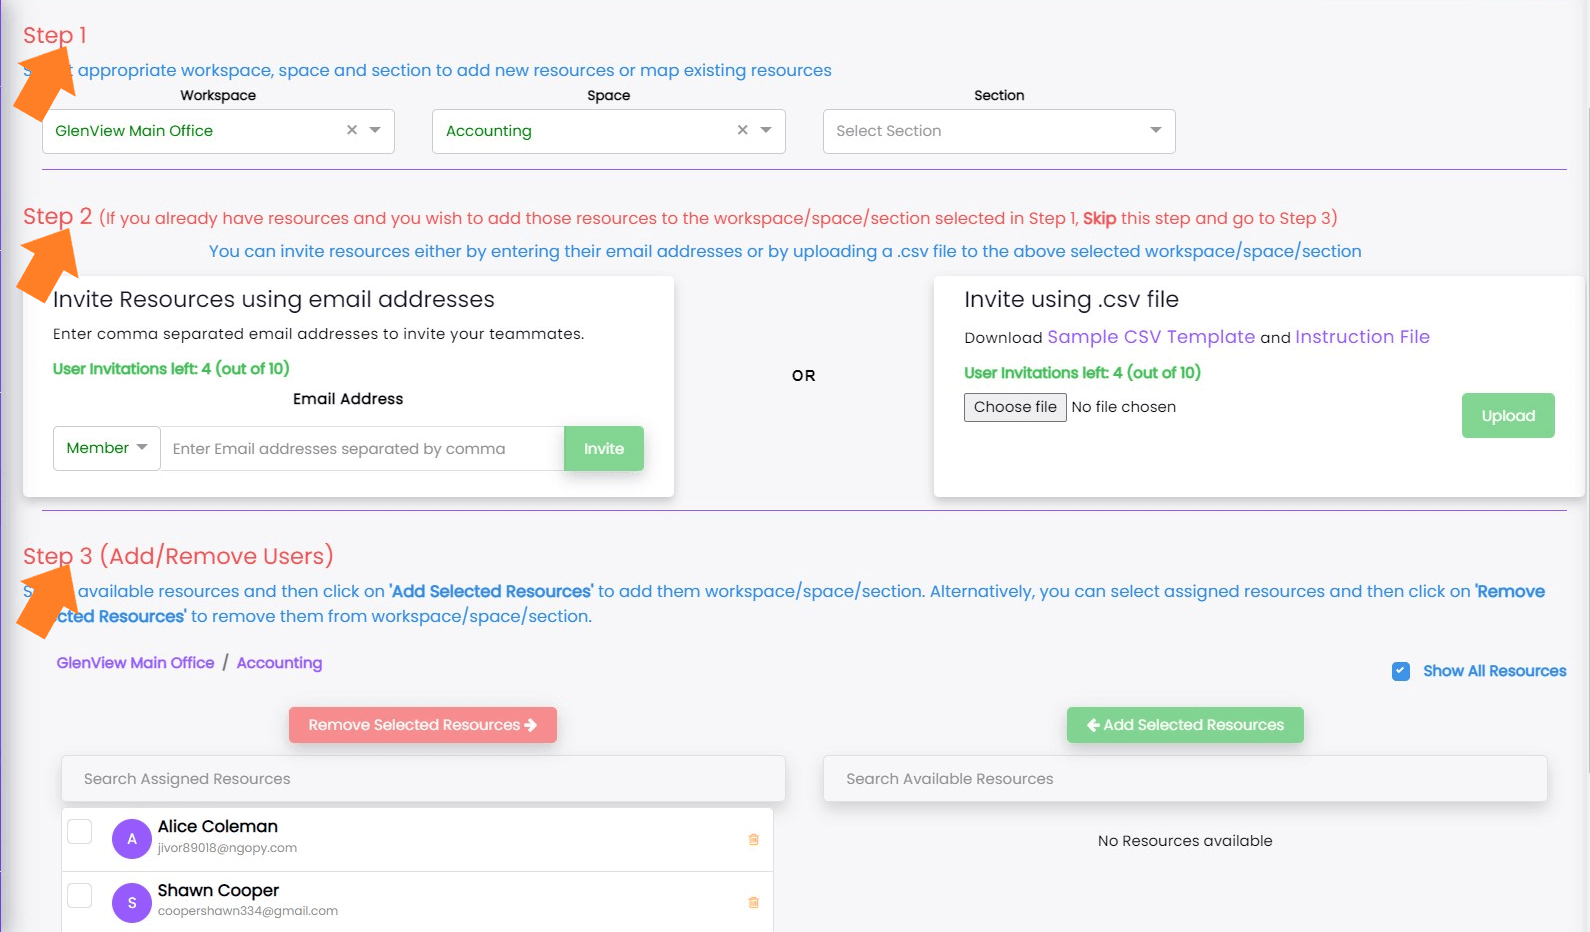
Assigning resources
- Click on Assign a resource.
-
A new window will appear from which you can select or
de-select the required resources.

-
Follow the Steps given on that page to add resources.
Note: In order to learn How to create a team go to
Setting up your Workspace's
Teams section
Renaming and Deleting Spaces
Who can rename or delete a space?
Only the admin and account with the manager privilege can
rename the space.
Guests, Members, and Clients are unable to rename it by
default.
How to rename/delete a space?
Renaming of spaces can be done to keep your workspace
organized and up to date! You should follow the given steps.
-
Navaigate to the workspace in which you want to edit or
delete a particular Space.
-
Go to Workspace settings at the bottom of the sidebar menu
by clicking on Workspace icon.
- Select the Spaces icon.
-
Find the space name that you want to rename and press the
dropdown icon beside it.
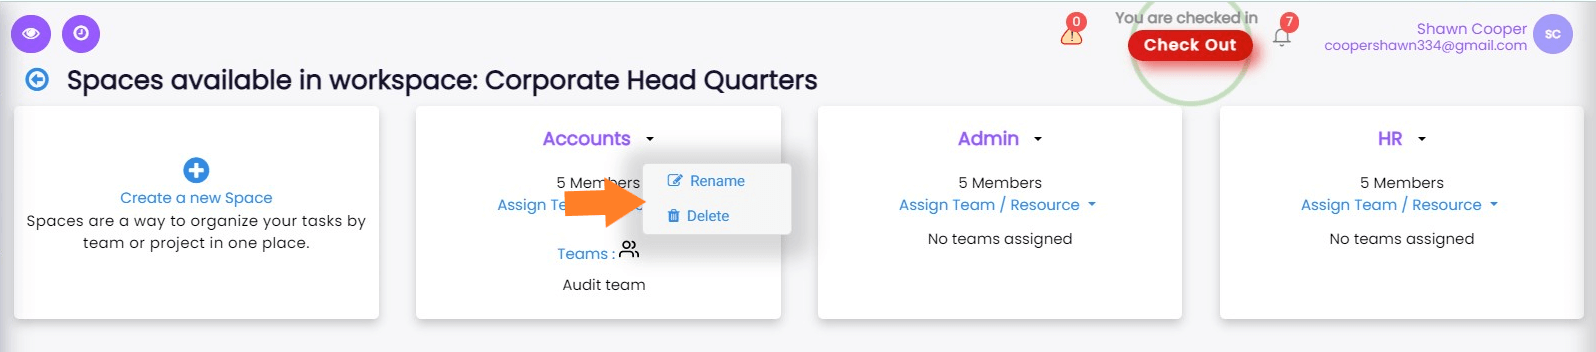
-
Click Rename. Write the new name and click
the update button.
OR
-
Click Delete and Select
'Yes' button in the prompt asking for the
confirmation.
You can also follow the following step to delete the Space.
-
Click on the Vertical ellipsis beside the Space name in the
sidebar menu.

- Click on Delete option.
-
Select the Yes on the confirmation prompt..
Spaces Miscellaneous - Assigned Resources
View the assigned resources in a space
-
In the sidebar menu of your workspace. Choose the Space for
which you wish to see the resources that have been allotted.
-
Click on Vertical ellipsis ( ⋮ ) beside it.
-
Select View Resources option and a new window will open
containing names of all the resources in that particular
Space.
Note: You can also click
Add Resources or
Add Teams and perform the addition of a
resource or team easily.
Note: To know more about
Create Section from Templates go to
Sections
help page.
Adding Teams To Space
-
In the sidebar menu of your workspace. Choose the Space for
which you wish to add teams.
-
Click on Vertical ellipsis ( ⋮ ) beside it.

-
Select Add Teams option to add available teams.

Manage Resource In-Charges
-
In the sidebar menu of your workspace. Choose the Space for
which you wish to manage resource incharges.
-
Click on Vertical ellipsis ( ⋮ ) beside it.

-
Select Manage Resource Incharges.
-
User can invite members via email or add existing resources.

Change Status
Users can change status of space with below options
- Close
- Pause
- Complete
- Cancel
- Active
- Under Review
How to change status of space?
- Click on vertical ellipse of space to open menu.
-
Hover on the Change Status option from the menu

-
Select any option from list of options and provide the reason.
Hiding Closed Sections
How to hide closed sections?
- Click on the Vertical ellipsis beside the section name in the sidebar menu.
-
Click on the checkbox to hide closed sections