Creating a new task
Who can create a new Task?
- Only the Admin and an account with the Manager privileges are allowed to assign tasks to other resources.
- Any user who is mapped to the Section can create a New Task.
The fundamental unit of data in this product can be thought of as a task. Regarding tasks, we have defined Workspaces, Spaces, and Sections. Subtasks are a subcategory of information that is contained within tasks. Tasks are used to divide your project into manageable pieces, which helps in achieving achievable goals and improving team efficiency, thereby streamlining workflow.
Who can create a new Task?
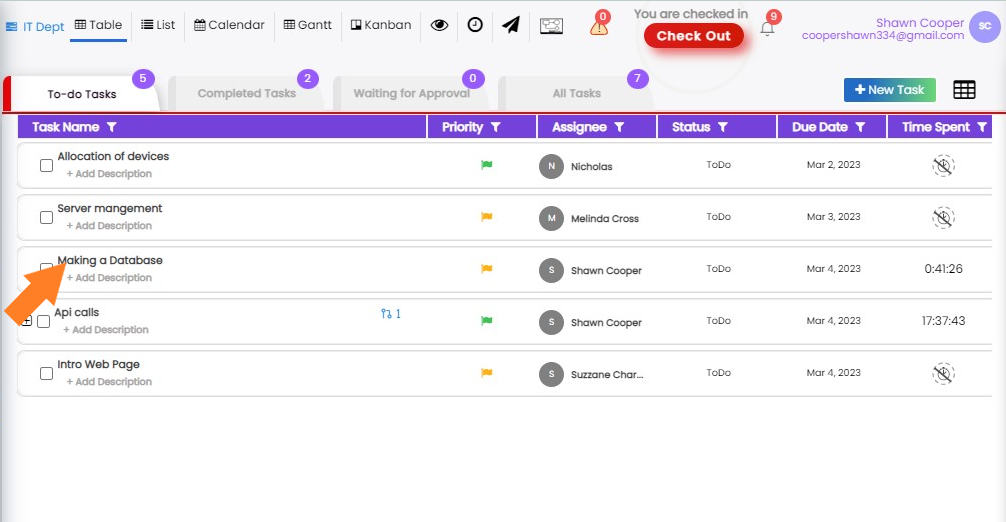
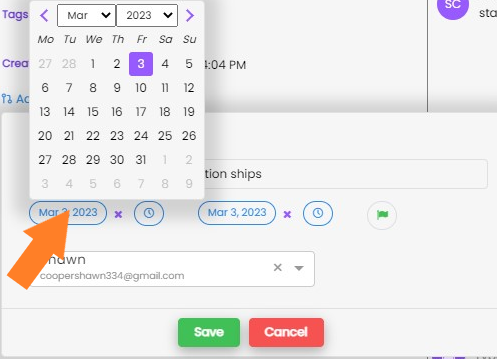
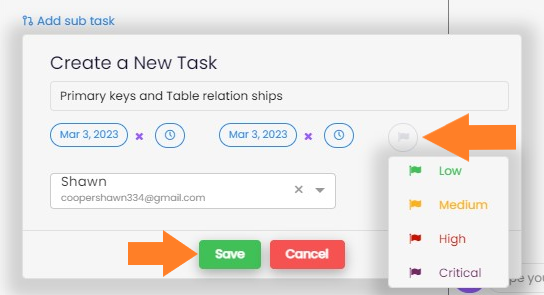
How to create a new Task?

Note: Please see the Settings section of PerXL hierarchy to find out more about who can assign a task and who can edit or change task properties.
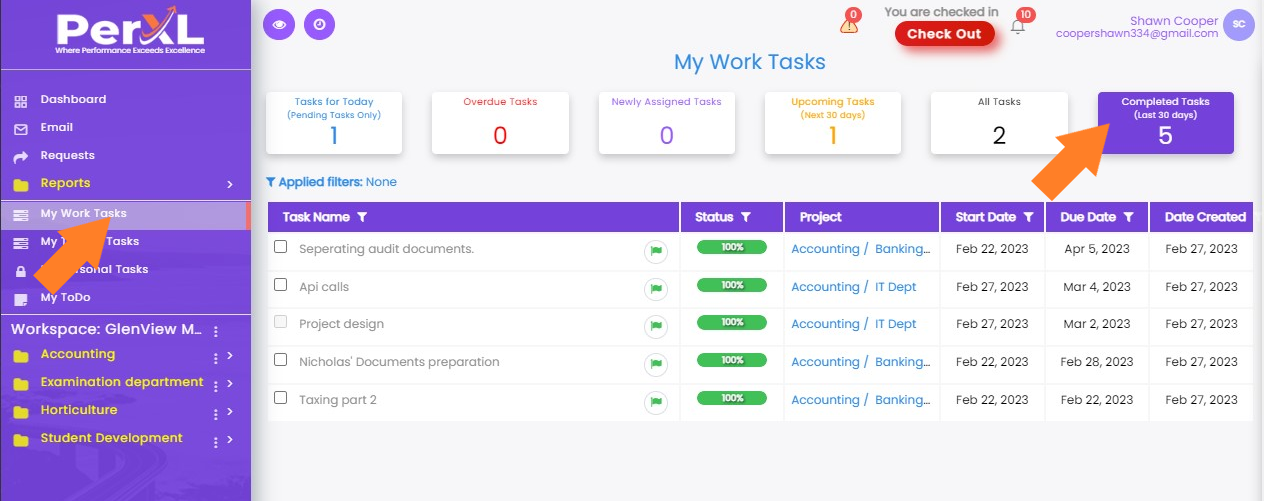
Note: You can use the My Work Tasks menu in the sidebar to see all the information regarding the tasks given to you.
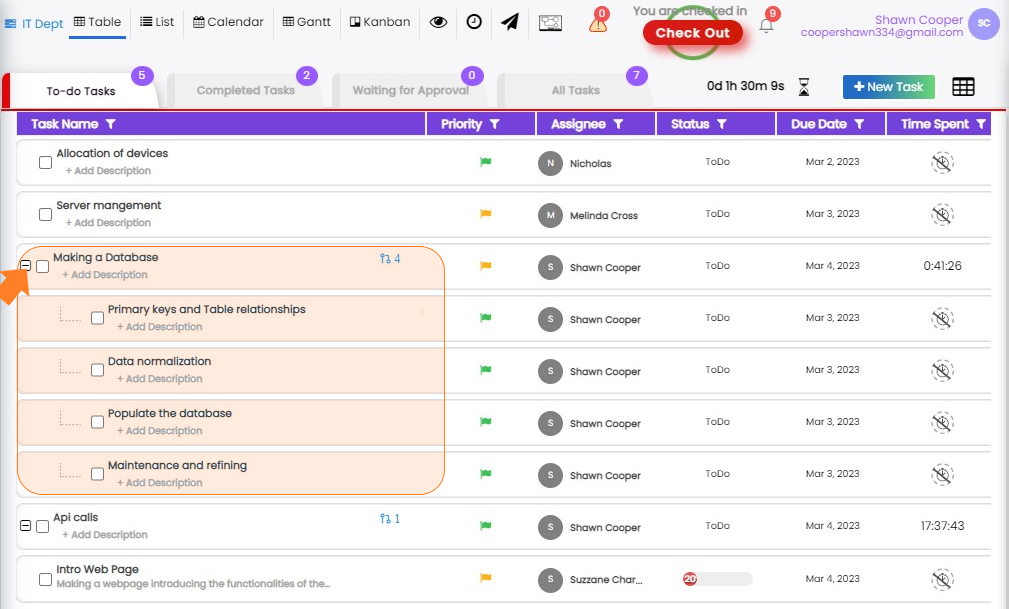
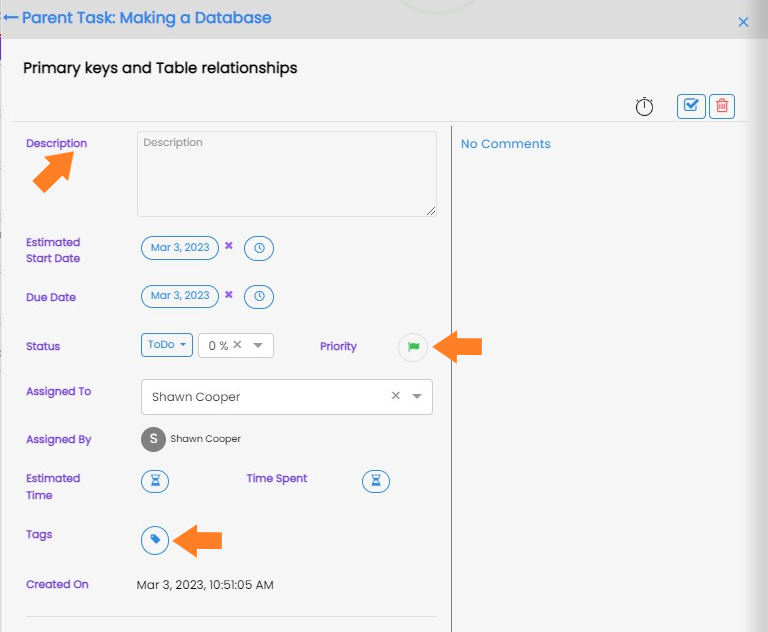
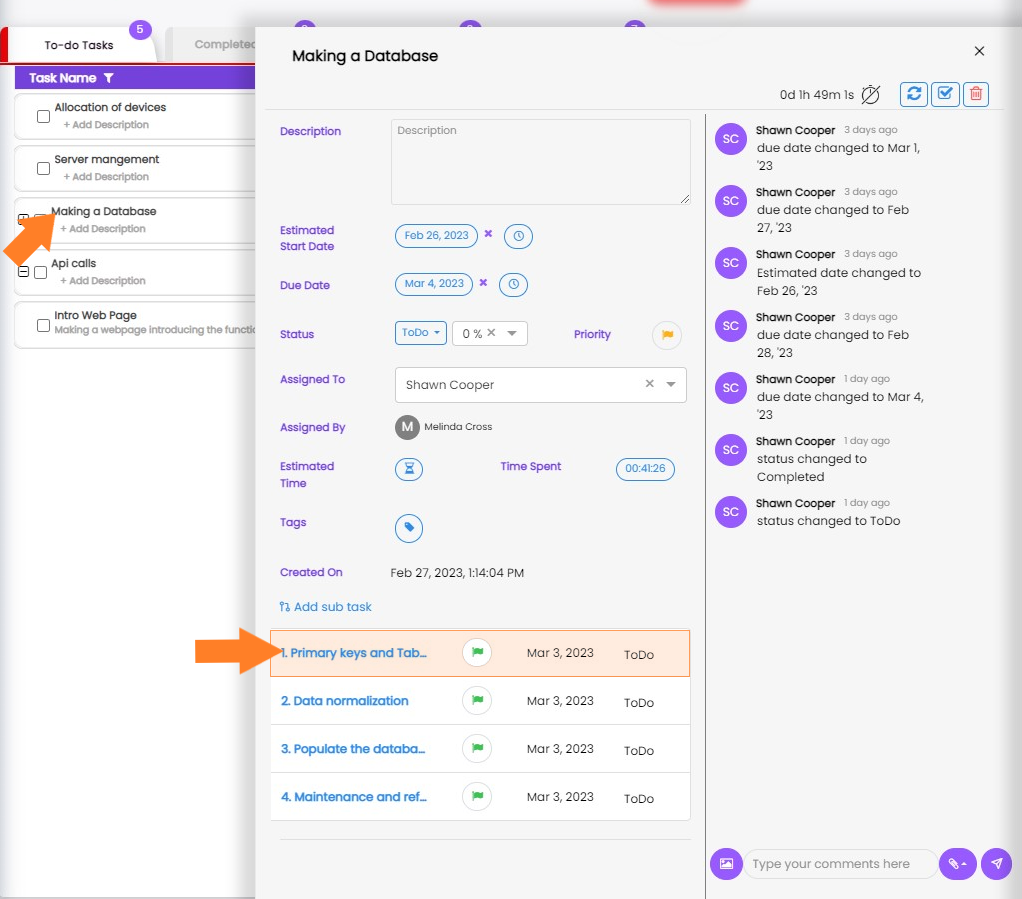
Subtasks are "Tasks within a Task" that have all the same features as a Task. They can be created if you want to divide your work further into smaller tasks so that it can be completed efficiently and in a time-bound manner.
Who can create a sub-task?
Any user can create a subtask, but only for the tasks that they have access to view based on their account permissions.
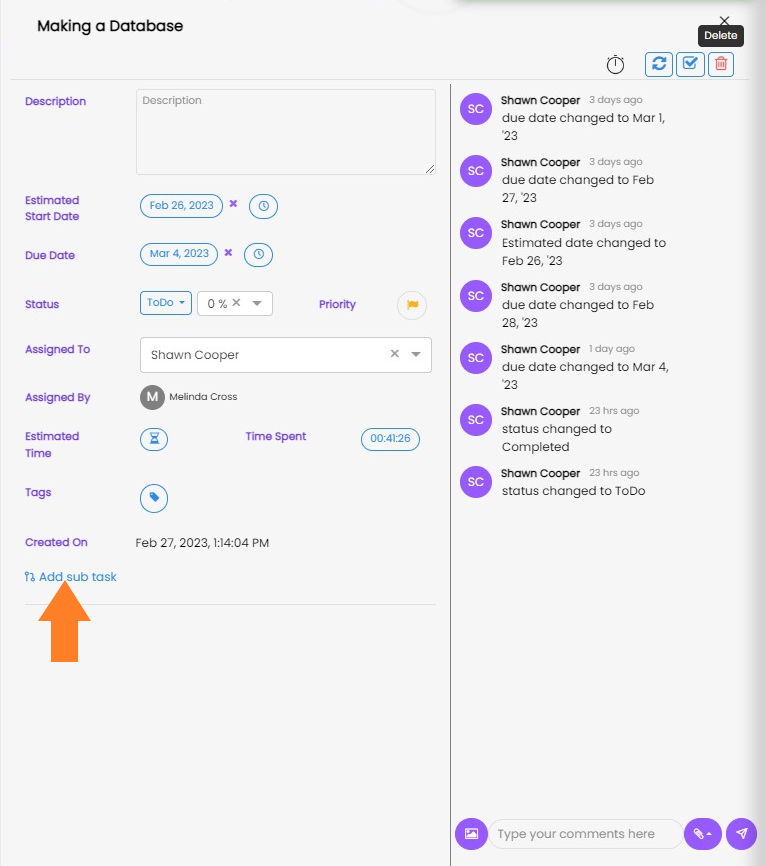
How to create a sub-task?
Note: If you want to assign subtasks to a role other than Admin or Manager you need to name them as assignee on the main task only then they can view the subtask given to them.
Note: You can also change the role settings to achieve the same.
Note: If you want create a new tag you need to click on tag icon and write the tag name in the textbox, press enter it will be created. Then you can edit that tag and apply it.
When you are working on a particular task it is important to keep record of the current state. There might be changes in the schedule or any other task fields. Thus it is important that our task reflects these changes.
Who can update a task?
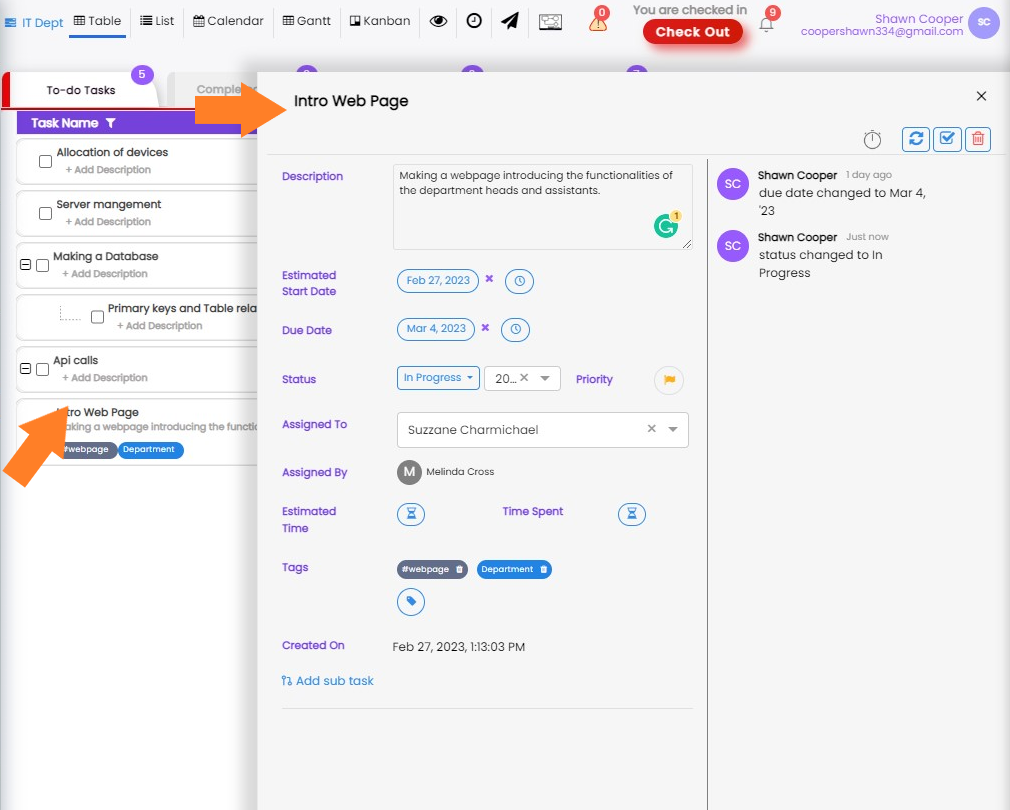
How to edit/update a task?
How to edit/update a subtask?
Alternatively, you can follow the given steps:
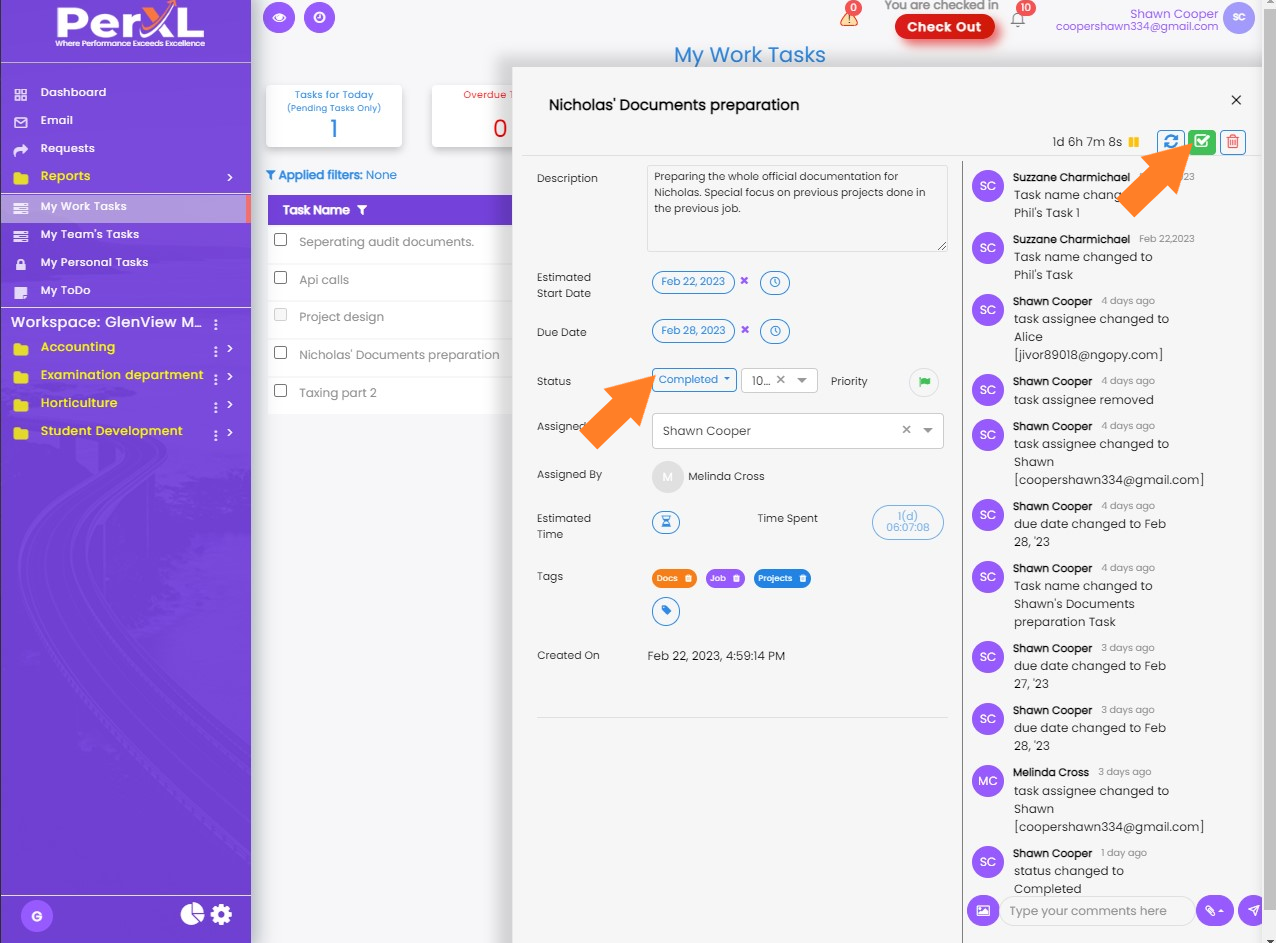
Tasks are automatically archived after completion and when status is changed to completed.
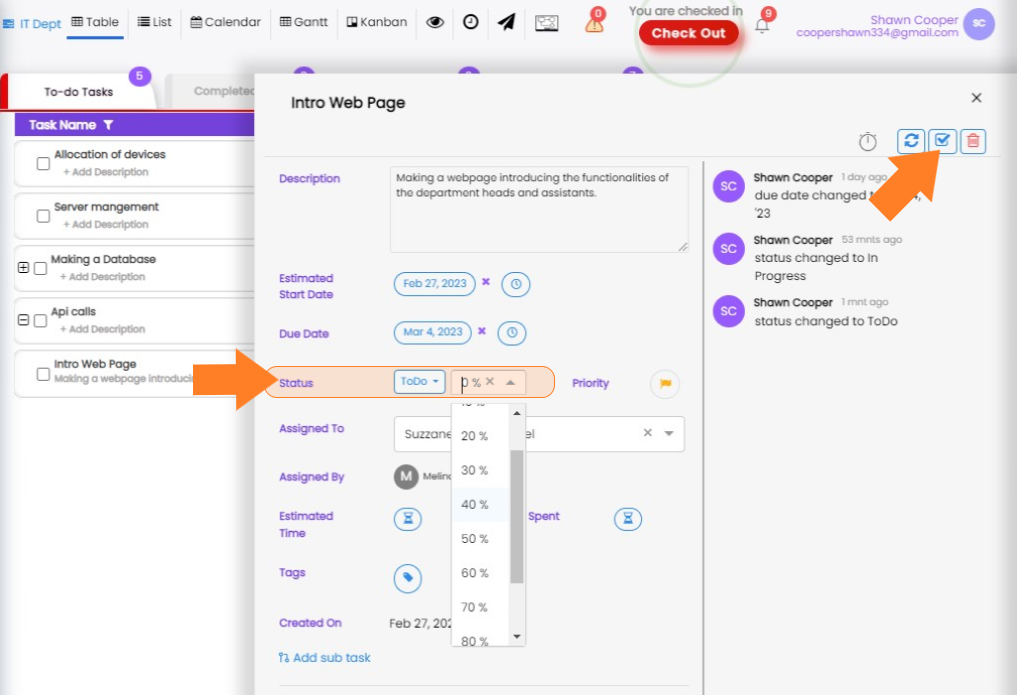
How to change progress and archive a task?
How to unarchive and view Archived tasks?
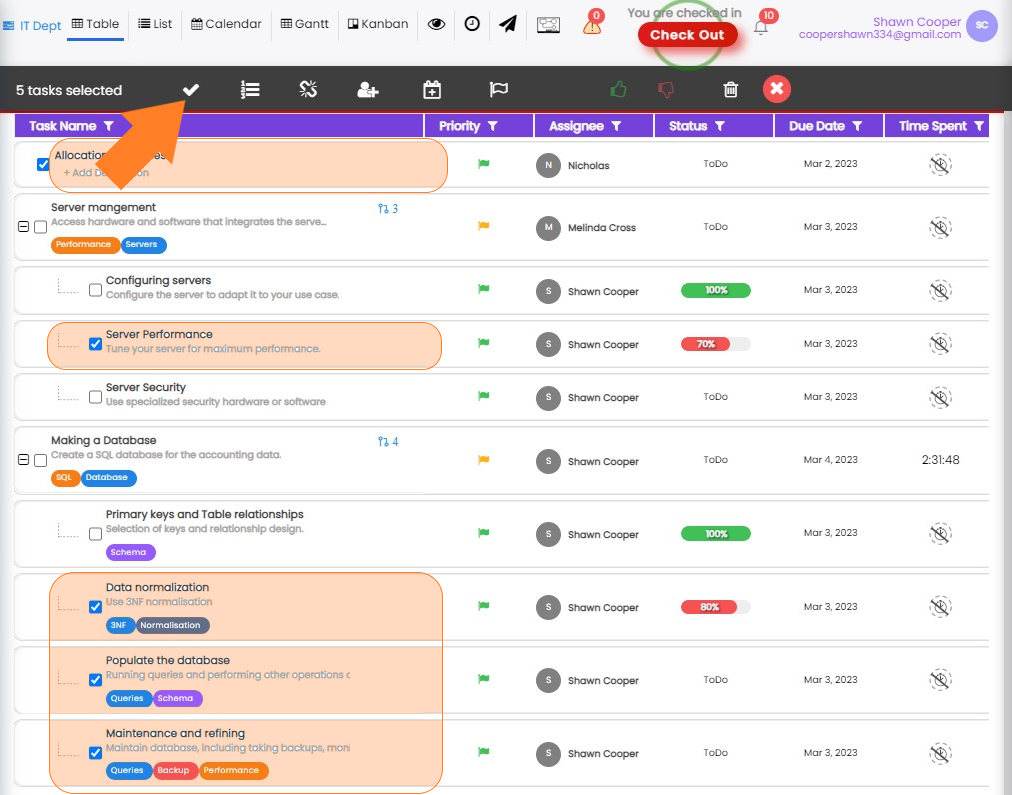
How to Archive multiple tasks/subtasks?
Note: If you archive a task the subtasks under it will automatically be archived.
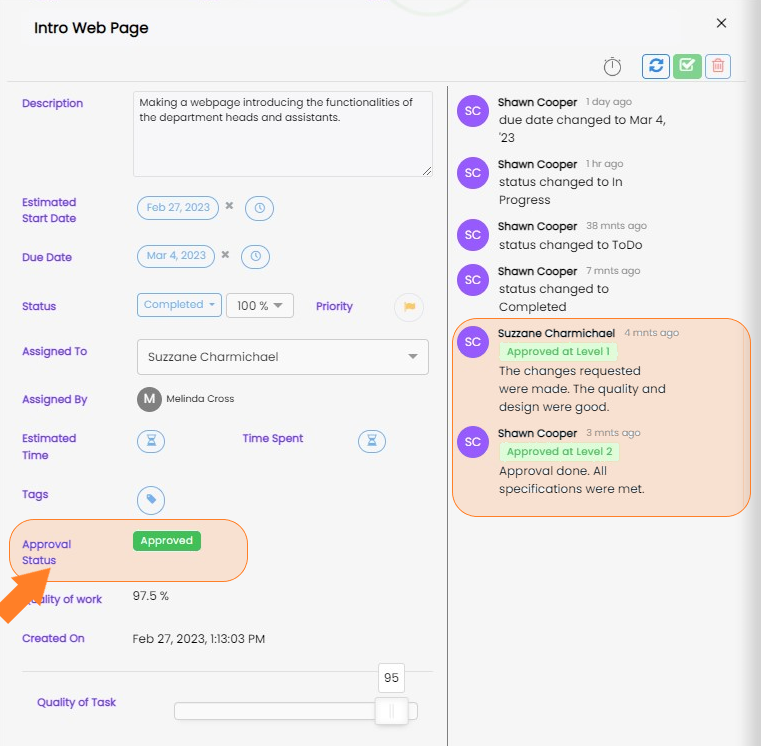
Note: If the task is given for approval then you cannot unarchive it or make any other status changes unless your approving manager rejects it.
Note: Also in case the task is approved you can view it but cannot unarchive or delete it.
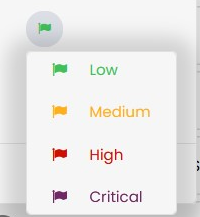
Note: You can also click Flag icon being displayed in the pop-up menu to change the priority of multiple tasks at the same time.
Collaborations are a great way to improve teamwork since there might be more than one person for the same task and they might need to share ideas. Team can provide feedback, receive feedback, and provide appraisals to each other. Thus, the collaborations are also available at task level.
Who can make comments or send attachments?
The admin, account with manager privileges, and any other account to whom the task is assigned are able to interact with the collaboration section of the tasks.
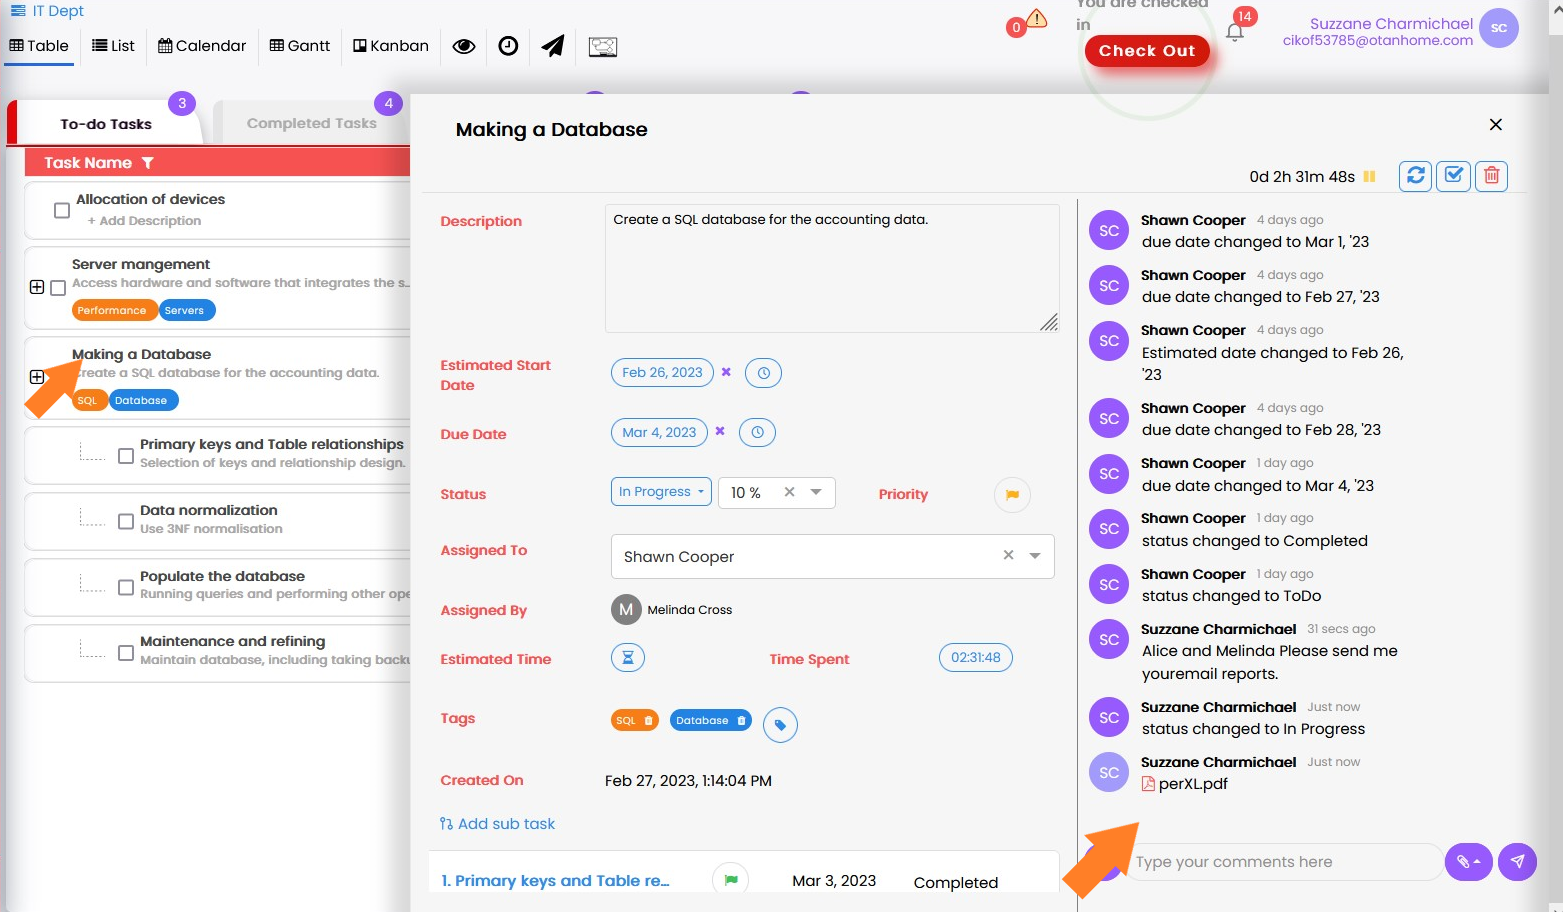
How to use collaboration?
Note: To access collaborations in a subtask you just need to click on subtask name in the task window.
Who can delete the task?
By default only the admin and an account with manager privileges can delete a task. But any account can delete a task that they have made themselves.
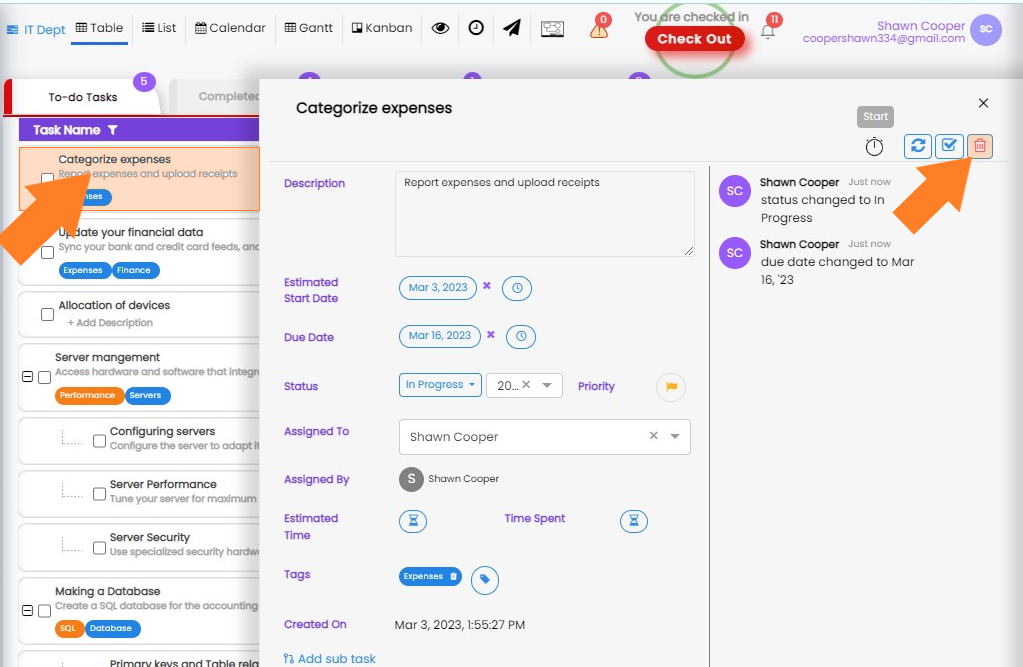
How to delete a task?

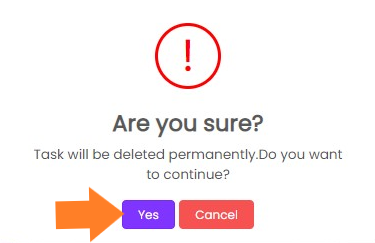
Alternatively, you can follow the given steps:
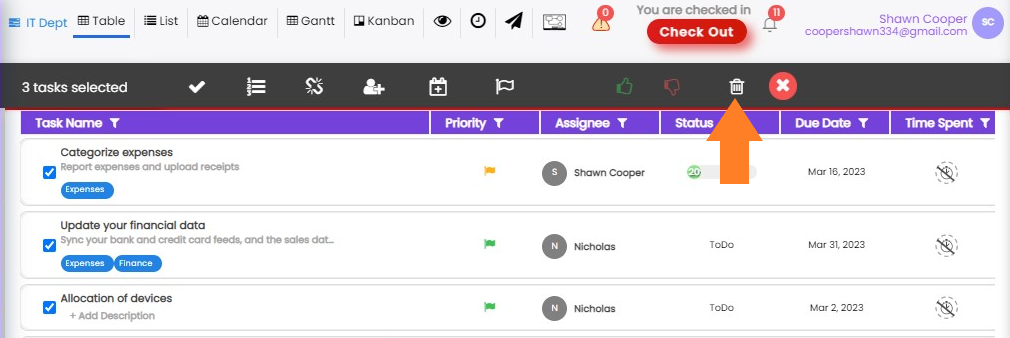
You can also select the checkboxes beside each task name and then select the bin icon in the pop-up menu that is being displayed at the top of the window.
Who can delete the subtask?
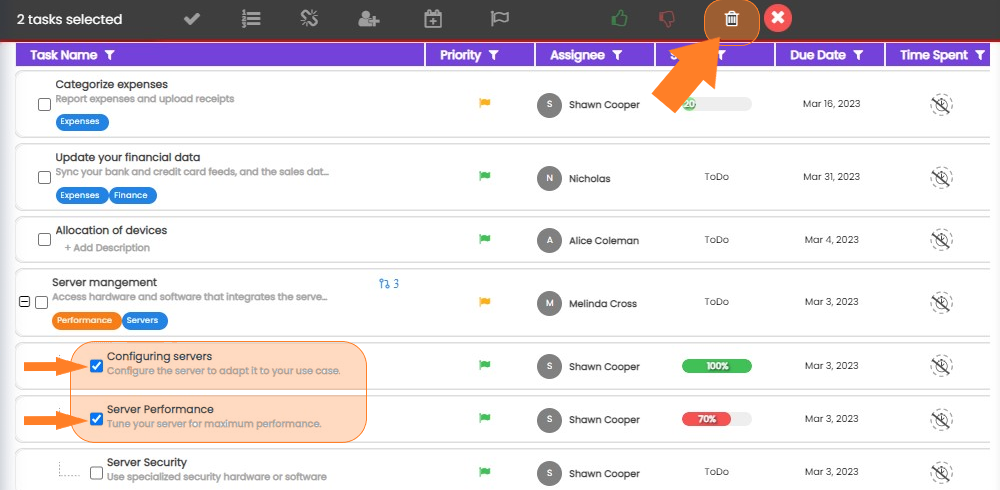
How to delete the subtask?
The process of deleting a subtask is similar to that of a task deletion. Follow the given simple steps.
Alternatively, you can follow the direct approach:
Who can Generate Subtasks Using AI?
Note: Please see the Settings section of PerXL hierarchy to find out more about who can Generate Subtasks using AI and who can edit or change task properties.


Once saved, the AI-generated subtasks appear under the selected task. You can scroll down within the Task Details page to view all subtasks, along with their assigned resources, due dates, and time estimates.

Note: Please see the Settings section of PerXL hierarchy to find out more about who can create a task from Requirements and who can edit or change task properties.


Provide the following details:

After filling in these fields, click the Submit button to proceed to the next step.
Based on your input, the AI will generate tasks and subtasks required to implement the project. In this step, you will see three action buttons:

Depending on the option selected in Step 2, the interface will change:


In this final step, you will see a summary of the generated tasks, including:

You can make changes if needed. Finally, click Save Task to create your tasks from requirements.
Note: Please see the Settings section of PerXL hierarchy to find out more about permissions related to comments, file sharing, and AI suggestions.


Note: Please see the Settings section of PerXL hierarchy to find out more about who can assign a task and who can edit or change task properties.


After selecting the appropriate resources, click on the Assign Tasks button. The system will automatically allocate the selected tasks to the chosen resources. Once saved, you can view the assignments in the Task Details page under the “Assigned To” section.
Note: Please see the Settings section of PerXL hierarchy to find out more about permissions related to comments, file sharing, and AI suggestions.


The Comments Area integrates AI assistance for better communication. When typing your comment:

AI Reply Suggestions:
In addition to editing assistance, the system now provides AI-powered
reply suggestions. When a message is received, the system automatically
generates a list of smart reply options for the recipient.