Pre-Built Demos

SaaSio comes with a beautiful collection of modern, easily importable, and highly customizable demo layouts.

SaaSio Main
Online Payment
Digital Agency 2023
Digital Marketing 2023
NFT 2023
SaaS 2023
IT Solution 2023
Help Desk
IT solution 2023 (V.2)
Law Firm
Cryto Currency
SaaSio NFT
SaaS Classic
SaaS Modern
Digital Agency
Marketing Agency
Digital Marketing
App Landing
Digital Agency 2
Business Consult-4
Personal Portfolio
Creative Studio
IT Solutions-3
Business & Finance
Digital Agency
Business Consulting
Digital Agency
Finance Consulting
Marketing
Gym Fitness
Education
Travel Agency
It solution-2
Business Consult-1
Business Consult-2
Business Consult-3
HR Management
CR Management
Social Media Marketing
Software Management
Cyber Security
Email Marketing
Web Application
SEO Agency
Resturannt
IT Solutions-1
Digital SEO
Startup Agency
Dark Version Demo
SaaSio Main (Dark)
Dark Version Demo
SaaS Classic (Dark)
Dark Version Demo
Digital Agency (Dark)
Dark Version Demo
StartUp Agency (Dark)
Dark Version Demo
HR Management (Dark)
Dark Version Demo
SMM (Dark)
RTL Version Demo
SMM (RTL)
RTL Version Demo
Digital Agency (RTL)
RTL Version Demo
SaaSio Main (RTL)
RTL Version Demo
HR Management (RTL)
RTL Version Demo
CR Management(RTL)
Sign In Get started

Workspaces

Virtual environment where tasks, projects, and related information can be organized and managed collaboratively or individually.
E.g.: Corporate Headquarters, California Division, Research & Development, Marketing Department, Remote Workers HQ, Startup Accelerator, etc.

Among the PerXL hierarchy, Workspaces rank the highest. All the spaces, sections, tasks, and sub-tasks live inside a workspace. Examples of workspaces can be Companies, Branches, Locations, buildings, universities, etc.

Creating a new Workspace

Who can create workspace
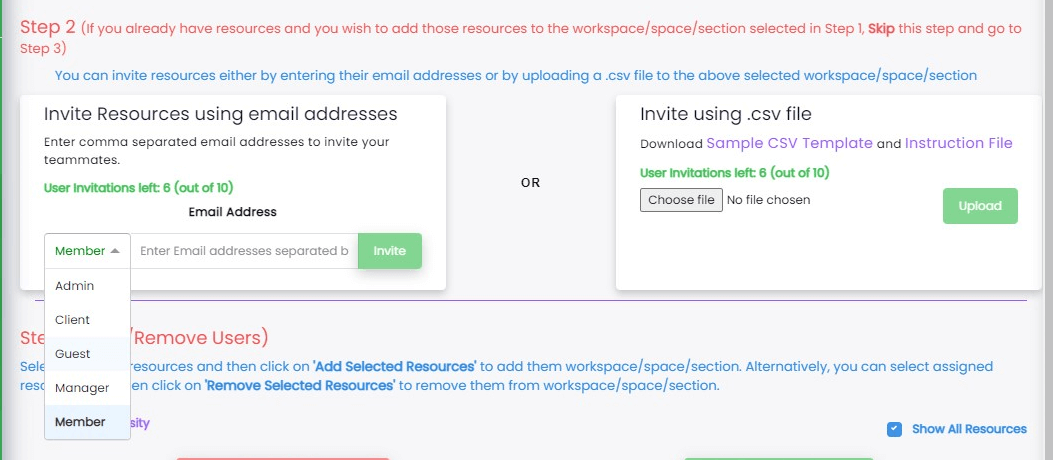
  1. Any person with an Admin account is the only one who can allocate resources to the workspace sections or projects.
  2. The admin can provide these permissions to anyone with a perXL account using Manage resource settings.

How to create a new workspace?

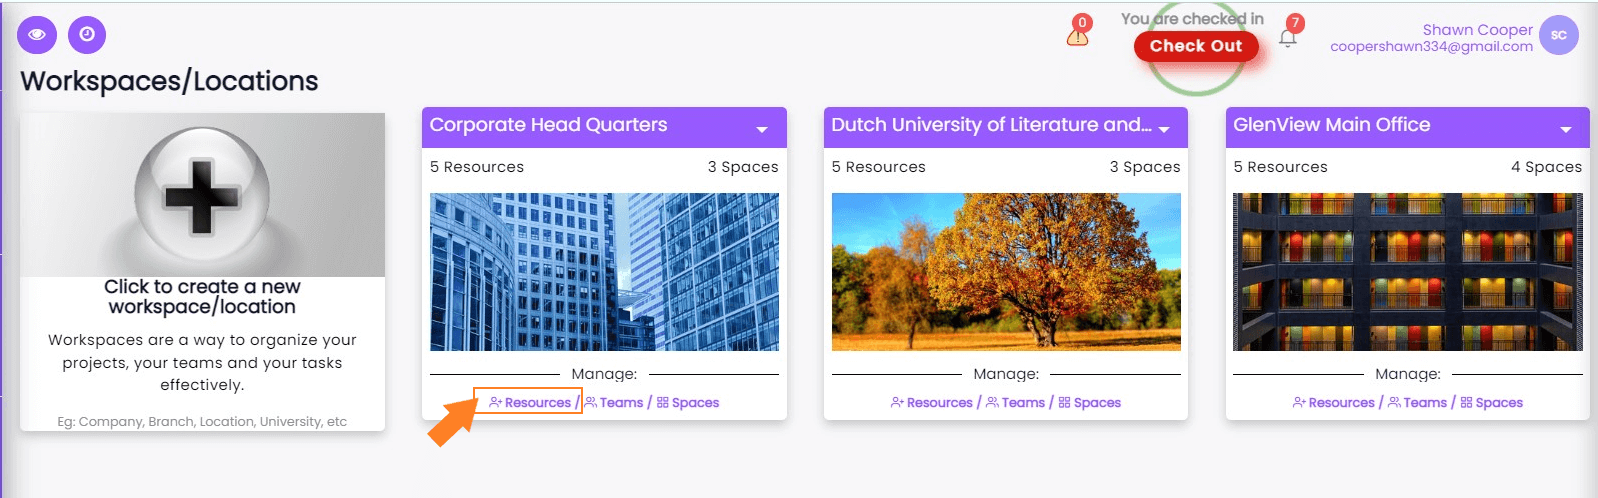
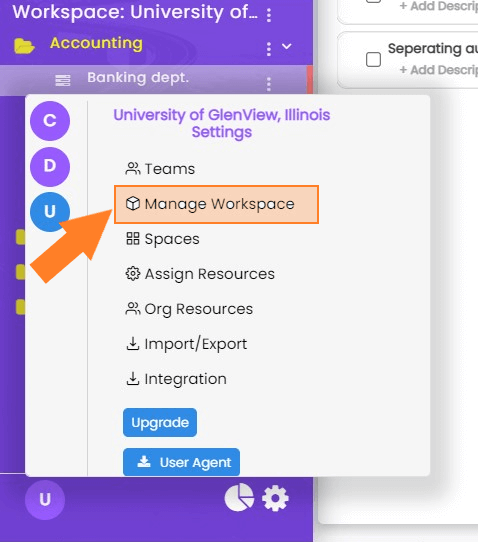
  1. Click on Workspace icon at the bottom left corner of the screen.
  2. Click on Manage workspace

    AI Task Description feature

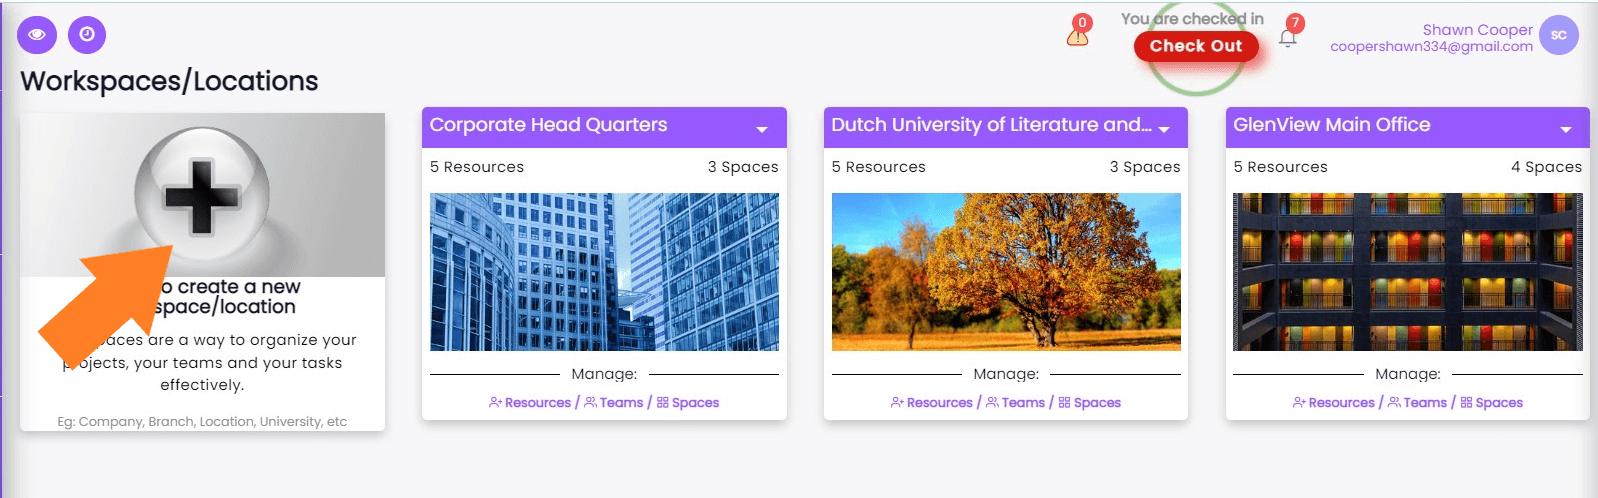
  3. Select 'click to create a new workspace/location'.
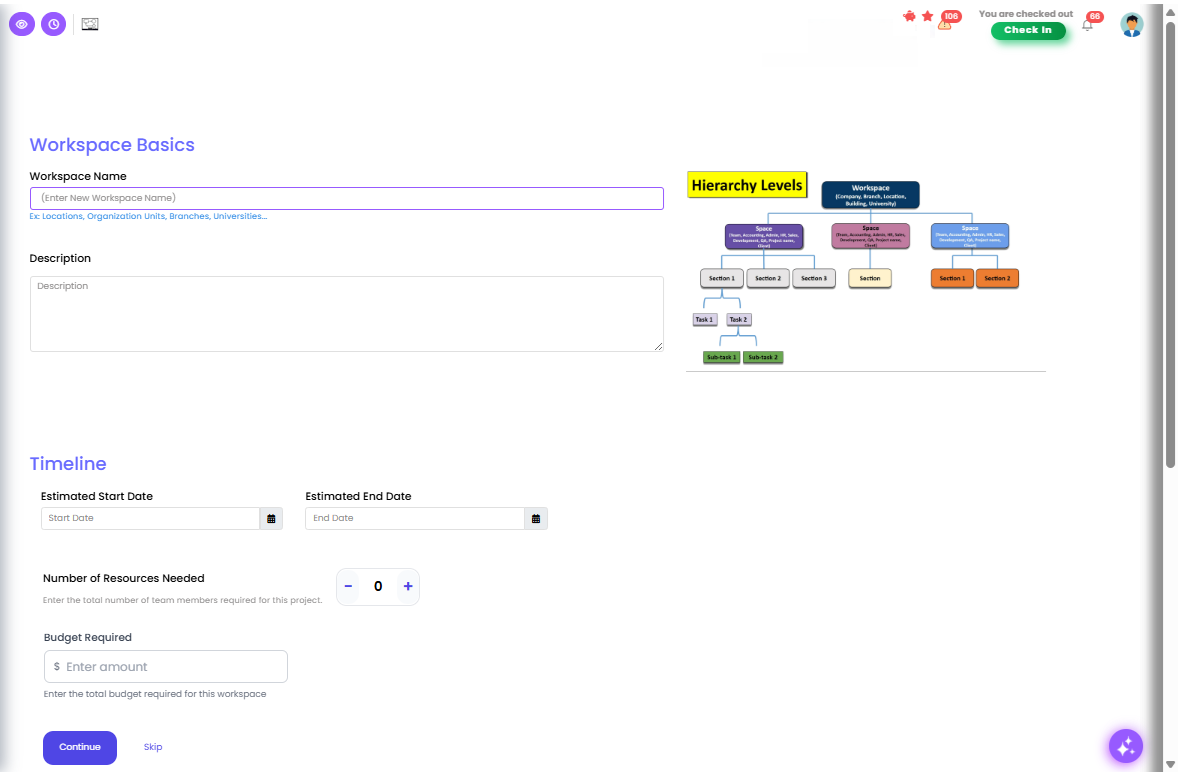
    AI Task Description feature

  4. Enter the name of the workspace and click the next button at the bottom of the pop-up window.

    AI Task Description feature

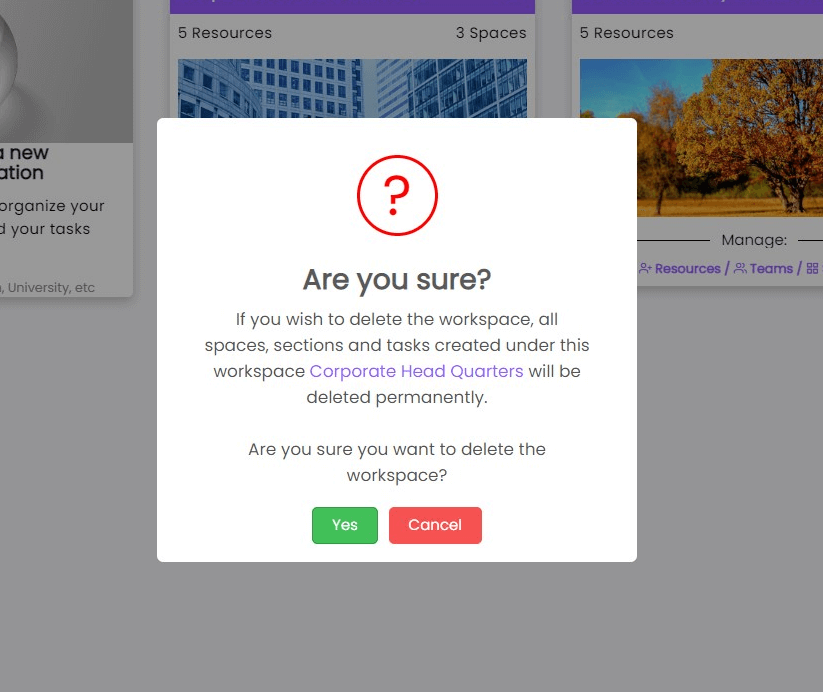
  5. You can now create spaces/divisions and sections after the above step or click on the cross icon at the top right to stop here at this step and create other heading later.

Adding Resources to your Workspace

In this section we will discuss the various resources type present and how you can add them to your workspace

Resource types

In this section we will discuss the various resources type present and how you can add them to your workspace

  1. Client
  2. Guest
  3. Manager
  4. Member
  5. Admin
  6. Custom Role

Who can add or remove resources?

Only the account with an Admin role or any other accounts which were given permission by the admin.

Inviting resources

You should follow the given steps to invite the required resources.

  1. Click on the Workspace settings icon at the bottom left of the screen.
  2. Select Manage workspace
  3. Click on the resources icon at the bottom of any workspace

    AI Task Description feature

  4. You can add the resources now by selecting the required workspace to add new resources or map existing resources.
  5. The Manage Resources window will open

    AI Task Description feature

  6. You can invite users by entering comma-separated email addresses in the given space on the page.
  7. Alternatively, you can upload a CSV file to send bulk invites to your team as shown in the following steps

Note: Please carefully select the type of Invite you are sending as all of them come with different access privileges.

Resending activation link or deleting resource

After you have sent the invitation link the user will receive an email with the activation link about his/her account which will be valid for 72 hours using which the user can log in to the account.

You should follow the given steps to invite the required resources.

  1. Click on the Workspace settings icon in the bottom left corner of the screen.
  2. Select Org Resources.
  3. Choose from the tab which has a “status” of Activation Pending.
  4. You can choose to Resend the Activation Link or Delete the resource permanently using the bin icon beside the resource.

    AI Task Description feature

Teams in workspace

Who can create a team?

By default, the account with Admin and Manager roles are allowed to create a team. You can provide permission to create a team to an Account with a custom role.

How to create a team?

It's convenient to create specialized team for a given workspace which can be later assigned to a section or a space.

Follow the given steps to make a custom team for any workspace.

  1. Navigate to a particular workspace in which you want to create a team.
  2. Go to Workspace settings at the bottom of the sidebar menu.
  3. Select the Teams option.
  4. Enter a new team name and click create a team button beside it.
  5. Click on the team icon and then select resources from the given options.

    AI Task Description feature

Editing and Deleting Workspaces

Deleting a workspace

Workspaces no longer required can be quickly deleted by following the given steps -

How to delete a workspace?

  1. Go to the Workspace setting icon at the bottom right corner of the window.
  2. Select the Manage Workspace option from the menu
  3. From the given Workspace available find the workspace's tab you want to delete and click on the drop-down menu for that tab.

    AI Task Description feature

  4. Select the Delete option if you want to delete.

    Note: Only the admin and Manager can delete a workspace. ‘Client’, ‘Member’, and ‘Guest’ roles do not have these permissions by default.

    AI Task Description feature

  5. Click Yes to delete the workspace

Customizing a workspace appearance

A similar process as above can be followed if you want to customize your workspace appearance or its name Changing the name or background image of the workspace icon

  1. Go to the Workspace setting icon at the bottom right corner of the window.
  2. Select the Manage Workspace option from the menu
  3. From the given Workspace available find the workspace's tab you want to edit and click on the drop-down menu for that tab.
  4. Select the Change image option to change the background image being displayed in workspace icon or Rename to update the workspace name.

    Note: Only the admin and Manager can delete a workspace. ‘Client’, ‘Member’, and ‘Guest’ roles do not have these permissions by default.

    AI Task Description feature